ecto General Use
This section is provided to give a quick overview of the features of ecto
The Menu bar
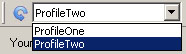
Choose a profile by selecting it in the dropdown menu on the left of the menu bar. If the dropdown menu is greyed out, this means you have only one profile.
Refresh a post or blog by selecting the post or blog in the list and then clicking the blue 'Refresh' button on the very left of the menu bar or choosing 'Refresh' from the File menu.
Perform entry actions like creating a new entry, saving an entry as a draft, previewing an entry or posting an entry by using the four entry action buttons on the menu bar. If you're unsure what one of these buttons does, hold your mouse pointer over it for a moment and a tooltip should appear, informing you about the function of the button.

Delete a post by choosing it in the 'Blogs and Posts' list and clicking on the red 'Delete' button.

Upload a file by selecting the 'Upload File' button on the right side of the menu bar or by choosing 'Upload Files...' from the File menu. See the uploading page for more information.
Open the settings window by clicking on the 'Settings' button on the absolute right of the menu bar or choosing 'Settings...' from the Edit menu.
Your Blogs and Posts
Look at recent posts from a blog by double-clicking on a blog in the 'Blogs and Posts' list.
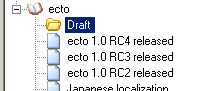
View or Edit an old post by double-clicking on a post once you have a blog refreshed.
Delete a post by right-clicking on the post in the 'Blogs and Posts' list and choosing 'Delete Post.'
Categories
Modify the categories for a post by opening a post to be edited and then clicking the buttons next to the categories to their 'on' or 'off' position. The first category in the list will become the primary category if that is an option set on your server.

Refresh the list of categories by clicking on the 'Refresh' button below the categories list.
The Entry Tabs (Basic, Advanced, Misc)
Change or add an entry title by filling in the 'Entry Title' field on the 'Basic' tab.
Change or add an entry body by filling in the 'Entry Body' field on the 'Basic' tab.
Change or add an entry excerpt by filling in the 'Excerpt' field in the 'Advanced' tab.
Insert currently playing media in to the body or extended post by clicking on the 'Media' button in either the 'Basic' or 'Advanced' tab. Configure media insertion in the Settings window.

Make a word bold or italic by selecting a word in your post body or extended entry and clicking on the 'Bold' or 'Italic' button on either the 'Basic' or 'Advanced' tab.
Create a link by clicking on the '<>' button and filling out the Link, Text, Title and Target fields. If text is selected when the link button is clicked, that text will already be filled in and linked when the process is complete.
Use a custom HTML Template by choosing the template from the 'HTML Templates' dropdown menu. If text is selected, the template will enclose the selected text.
Add keywords to your post by adding words to the 'Keywords' field in the 'Misc' tab.
Trackback to another post by adding it's trackback ping URL to the 'Send Trackback' field in the 'Misc' tab. Place one URL on each line.
Ping an update service by adding it's ping URL to the 'Ping URL' field. Place one URL on each line.
Change the time of your entry by modifying the date in the 'Custom Publish Time' field. Some weblog services will not post your entry until it's publish date (if it's in the future). Set this field to the current time by clicking on the 'Reset' button.

Modify comment settings by choosing different values for the 'Comments' dropdown menu. 'Open' comments can be commented on. 'Closed' comments can be seen but not added to. 'None' prevents comments from being displayed or added to.
Modify text formatting by choosing a text format from the 'Default Text Formatting' dropdown menu.
Modify trackback settings by checking or unchecking 'Allow Trackbacks.'
Remember to save your entry either as a draft or online after making any changes to the entry itself or the preferences that pertain to the entry. Not doing so may result in loss of data.